The realm of new flooring upgrades is filled with endless choices. However, one option that stands out due to its durability, affordability, and aesthetic appeal is the glue down LVP or Luxury Vinyl Plank flooring. This article aims to guide you through the process of how to install glue down LVP flooring in an easy-to-understand manner.
What is Glue Down LVP Flooring?
Luxury Vinyl Plank, or LVP flooring, is a vinyl-based flooring option that mimics the appearance and texture of hardwood. It comes in long strips, usually ranging between 3-8 inches in width and 36-48 inches in length. A typical vinyl flooring comprises four essential layers!
Wear Layer
The wear layer is a transparent, protective coating on the surface of the flooring. This layer is crucial for protecting the vinyl planks from scratches, stains, and fading caused by daily wear and tear, as well as exposure to sunlight. The thickness of the wear layer varies across different products, with thicker layers offering better protection and longer life for the flooring. This makes LVP an excellent choice for high-traffic areas in both residential and commercial settings.
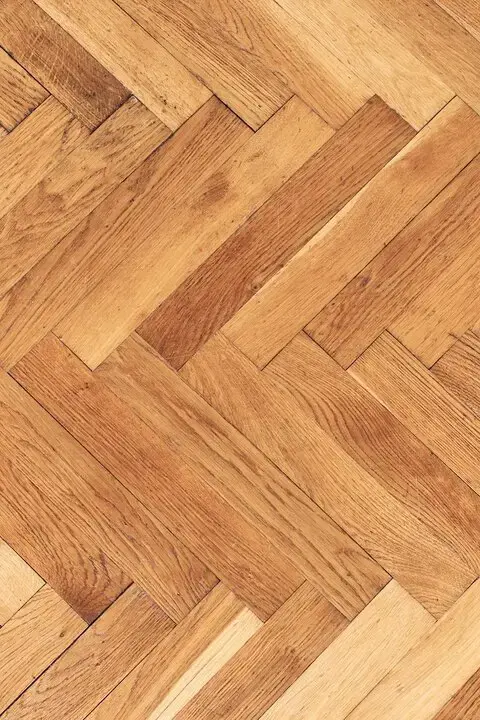
Decorative Image
Beneath the wear layer lies the decorative image layer, a high-resolution digital image that gives the LVP its realistic wood-like appearance. This layer can replicate a wide range of hardwood species, colors, and textures, allowing homeowners to enjoy the look of exotic or expensive wood floors without the high cost or maintenance. Some LVP products are even deeply embossed, enhancing the texture to more closely mimic the feel of real wood underfoot.

Vinyl Core
The vinyl core layer is the heart of LVP flooring, providing stability, strength, and flexibility. This layer is made from a dense, waterproof vinyl composite that ensures the floor remains flat and stable, even in areas of high moisture or temperature fluctuations. The vinyl core’s waterproof nature makes LVP flooring an ideal choice for kitchens, bathrooms, basements, and other areas prone to spills and moisture.
Backing Layer
Finally, the backing layer forms the foundation of vinyl plank flooring. This layer is also waterproof, adding an extra level of protection against moisture from below. It provides cushioning underfoot, enhancing the comfort of the flooring, and helps to prevent mold and mildew buildup, ensuring a healthier living environment. The backing layer also contributes to the overall sound insulation of the flooring, making vinyl plank flooring a quiet and comfortable choice for any room.
Together, these four layers make vinyl plank flooring a highly durable, attractive, and versatile option for homeowners and businesses alike. Its ease of installation, particularly with the glue-down method, allows for a secure and stable flooring solution that can withstand the rigors of daily life while maintaining its beauty for years to come.
Why Choose Glue Down LVP Flooring
If you’re wondering why you should opt for glue down vinyl plank flooring, here are some compelling reasons!

Resembles Hardwood Flooring
One of the most significant advantages of LVP flooring is its ability to closely mimic the look and feel of natural hardwood. Thanks to advanced printing and texturing technologies, LVP offers an authentic wood appearance, including grain patterns, colors, and textures that are hard to distinguish from the real thing. This makes it an affordable alternative to expensive hardwood flooring, allowing homeowners and businesses to achieve a luxurious look without breaking the bank. The glue-down method ensures that the planks lay flat against the subfloor, providing a stable and seamless finish that further enhances the realistic appearance of the floor.

Waterproof
Unlike traditional hardwood, which can warp, swell, or become damaged when exposed to moisture, LVP flooring is 100% waterproof. This characteristic makes it an ideal choice for moisture-prone areas such as kitchens, bathrooms, laundry rooms, and basements. The waterproof nature of LVP ensures that spills, humidity, and moisture do not affect the integrity or appearance of the flooring, making it a durable option for both residential and commercial applications. The glue-down installation method creates tight seams between planks, further protecting the subfloor from moisture damage.
Easy Installation
Glue down LVP flooring is renowned for its ease of installation, making it a viable DIY project for handy homeowners. Unlike hardwood flooring, which often requires professional installation, LVP can be easily cut to fit and glued directly to the subfloor. This process eliminates the need for complicated tools or specialized skills, saving time and installation costs. The adhesive provides a strong bond that ensures the flooring remains securely in place, offering a smooth and consistent surface that lasts for years.

Low Maintenance
Maintaining glue down LVP flooring is remarkably straightforward and hassle-free. The surface is resistant to stains, scratches, and dents, making it ideal for high-traffic areas. Regular cleaning involves simply sweeping or vacuuming to remove dust and debris, followed by mopping with soapy water to keep the floor looking pristine. Unlike hardwood floors, which may require refinishing or special cleaners, vinyl plank flooring does not need waxing, polishing, or any special maintenance to retain its appearance. This low-maintenance aspect, combined with its durability, makes LVP an economical and practical choice for busy households and commercial spaces alike.
Step-by-Step Installation of Glue-Down LVP Flooring
Follow these simple installation instructions to install your glue-down LVP flooring!
Preparing the Subfloor
The foundation of a great flooring installation is a smooth and level subfloor. You should not have to remove baseboards. Begin by thoroughly cleaning the subfloor to remove any dust, dirt, or debris. It’s crucial to ensure the subfloor is dry and free from any moisture issues for the floating floors. If necessary, use a leveling compound to address any uneven areas and create a flat surface. This step is vital for preventing future problems such as buckling or gaps in the flooring. A properly prepared subfloor will support the adhesive’s performance, ensuring a strong bond with the LVP planks.
Measurement and Planning
Accurate measurement and thoughtful planning are key to a successful installation and learning how much flooring is needed. Measure the room to calculate the total square footage and determine the amount of flooring needed. It’s advisable to purchase a little extra to account for cutting waste and any potential mistakes. When planning the layout, consider the direction in which the planks will run. Ideally, planks should run parallel to the longest wall to enhance the room’s visual length. Remember to leave a 1/4-inch gap around the perimeter of the room to allow for expansion and contraction due to temperature and humidity changes.

Application of Adhesive
Select a high-quality, pressure-sensitive adhesive evenly designed for LVP flooring. Using a notched trowel, spread a thin, even layer of adhesive over the subfloor, working in manageable sections to prevent it from drying out prematurely. The adhesive should be tacky to the touch but not wet when laying the planks. This ensures a secure bond without the risk of shifting or bubbling. Follow the manufacturer’s instructions regarding open time and working time to achieve the best results.
Laying the Planks
Begin laying the planks at the predetermined starting point, usually one corner of the room. Press first plank firmly into the adhesive, ensuring it adheres well to the subfloor. Use a tapping block and rubber mallet to gently secure the planks into place, ensuring tight seams and a level surface. Be mindful of the pattern and alignment as you progress, using a utility knife, carpenter’s square, chalk line, or flooring cutter to trim planks in a straight line as needed for a precise fit around obstacles or at the room’s starting wall edges.

Post Installation
Once all the planks are laid, inspect the floor for any gaps or misalignments and make adjustments as necessary. Roll the entire floor with a 75-100 lb. floor roller to ensure full adhesion and remove any air pockets. Allow the adhesive to cure according to the manufacturer’s recommendations before walking on the floor or moving furniture back into the room. This waiting period is crucial for the longevity and performance of your new floor.
Maintenance
Proper care will extend the life and appearance of your LVP flooring. For the first week, avoid washing or heavy cleaning to allow the adhesive to fully bond. Regular maintenance includes sweeping, vacuuming, and occasional mopping with a damp mop and mild cleaner. Avoid using abrasive cleaners or scrubbers that could damage the wear layer. With proper installation and care, your glue-down vinyl plank flooring will look beautiful and perform well for many years.

conclusion
Installing glue down LVP flooring can be a fun DIY project that not only enhances the aesthetics of your living space but also adds value to it. However, if you’re unsure about undertaking this task on your own, don’t fret. The team at Jung Tile is here to help with your vinyl plank flooring installation. Get in touch with them today and enjoy a hassle-free flooring installation experience!